- May 2, 2023
- Velvet North
- 0 Comments
- Free Patterns
Creating a baby hat pattern is a great way to show your creativity and make something special for the little ones in your life. I recently created a baby hat pattern using the honeycomb brioche stitch, and it was an incredibly rewarding experience. Not only did I learn how to knit this unique stitch, but I also got to create something that my friends and family could enjoy. In this article, I’ll share my process of creating the pattern and provide some tips for anyone looking to try their hand at knitting a baby hat.
Table of Contents
ToggleHow many stitches cast on for different size honeycomb brioche stitch baby bonnet
Knitting gauge is a crucial element of any knitting project, yet it’s often overlooked by novice knitters. I wrote an article about knitting gauge few weeks ago.
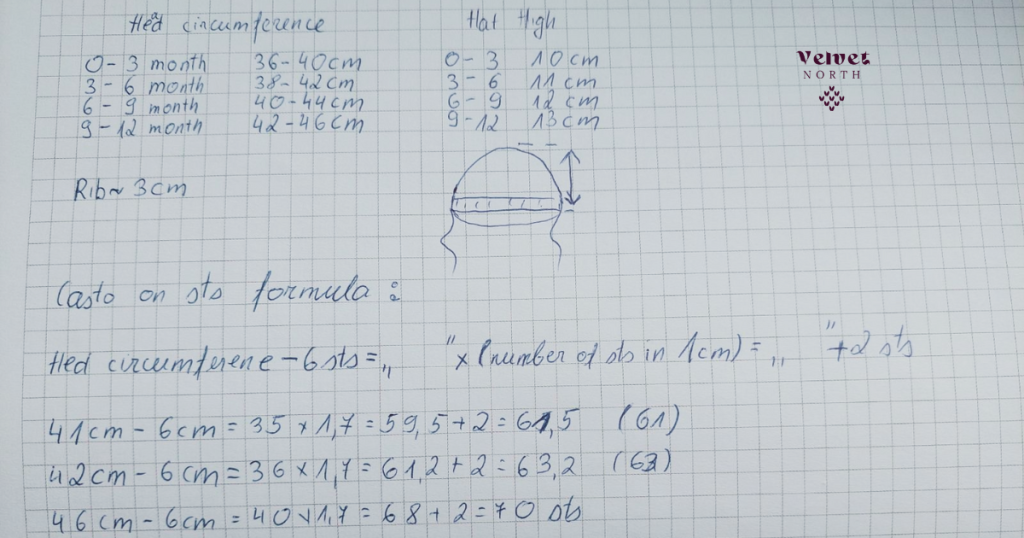
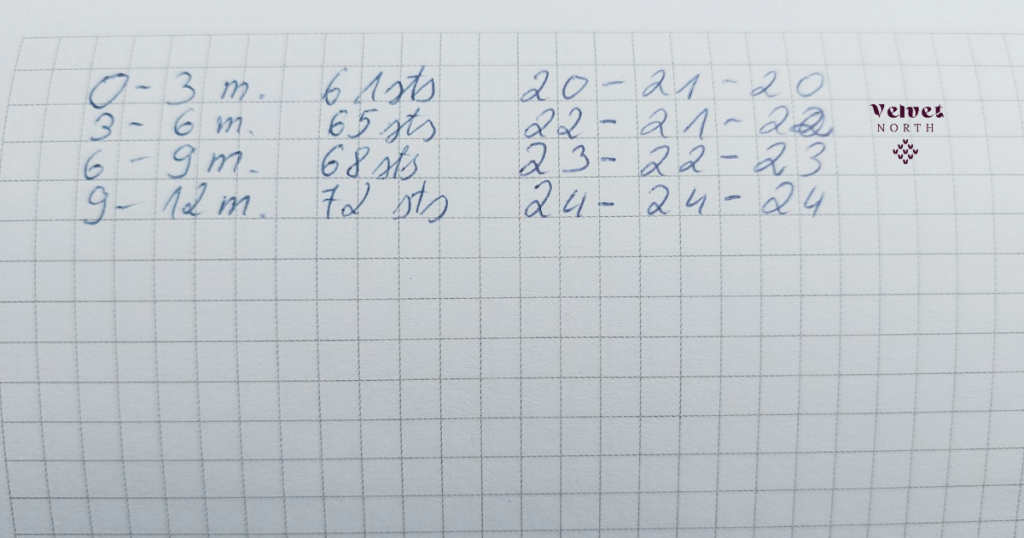
Creating a cast on sts sheet is an essential part of knitting. Knowing the right gauge for your project is important to ensure that it turns out as desired. A cast on sts sheet can help you keep track of the gauge and make sure that you are knitting with the right size needles and yarn for your project. It also helps you save time by eliminating guesswork when casting on stitches and ensuring that each row has the correct number of stitches.
In my project, 17 stitches in 10 cm (4 in.). So I have 1.7 sts in one centimetre. When you have this number you can use my formula, which you can see in the picture below.
Knitting materials
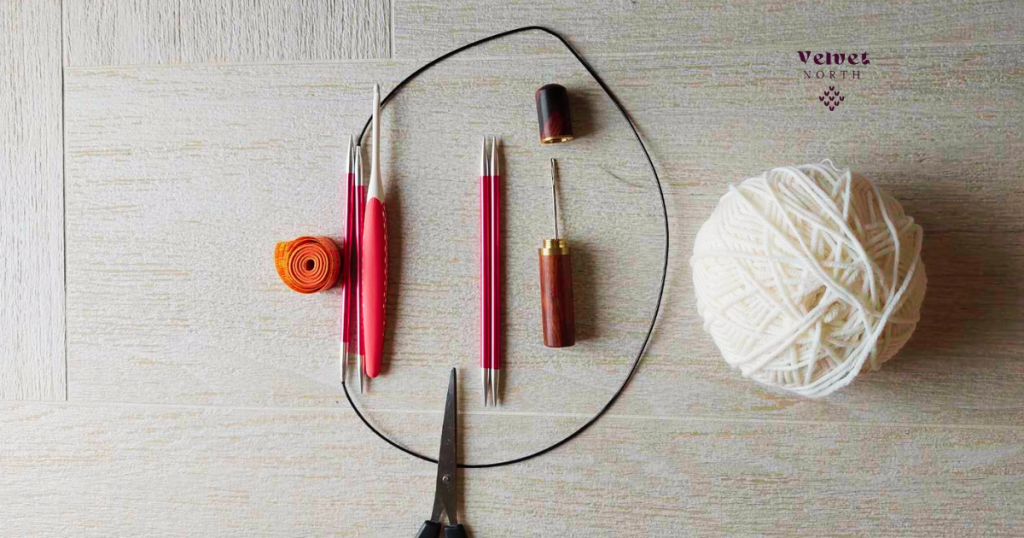
- Yarn: DK weight 100% Merino Wool “Sesia” approx. 150g/220m.; Color 1652
- 5 mm (US 8) straight and circular needles;
- 1 tapestry needle for finishing;
- Scissors;
- Measuring tape.
- Stitch markers.
Abbreviations
- k – knit
- pm – place marker
- k2tog – knit two together (though the front loop)
- k2togb – knit two together through the back loop
- K1bo: Knit one stitch from the row below (insert the needle in the stitch from the previous row and knit)
- k2tog-str: Knit together the long diagonal strand placed around the next stitch on the left-hand needle (formed on the row below), along with that stitch.
K2tog-rl: Put the “right leg” of the v (the right leg of the next stitch) onto the left-hand needle, and knit that loop with that stitch together.
- M – marker
- SM – slip marker
slst – slip stitch
ssk – slip slip knit
- HB – honeycombe brioch stitch pattern
Knitting body of the honeycomb brioche stitch baby bonnet:
Using 5 mm knitting needles cast on 65 stitches (size 3-9 month).
Rows 1-5: [k1, p1] – repeat till the end of the row.
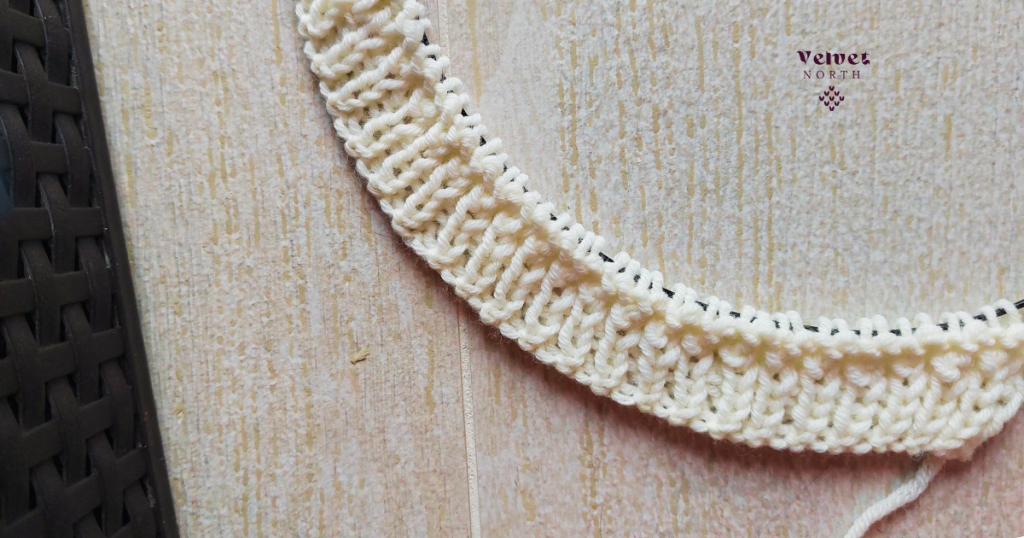
6 row (RS): K1, *K1, K1bo*. Repeat from * to *, to last st, K1
7 row: K1, *k2tog-str, K1*. Repeat from * to *, to last st, K1
8 row: K1, *K1bo, K1*. Repeat from * to *, to last st, K1
9 row: K1, *K1, k2tog-str*. Repeat from * to *, to last st, K1.
Rows 6 to 9 creates the pattern, and will be repeated until the desired length is reached. In my project is 11 cm.
Shaping the crown
Count 22 stitches from both sides and place markers. 21 stitches in the center.
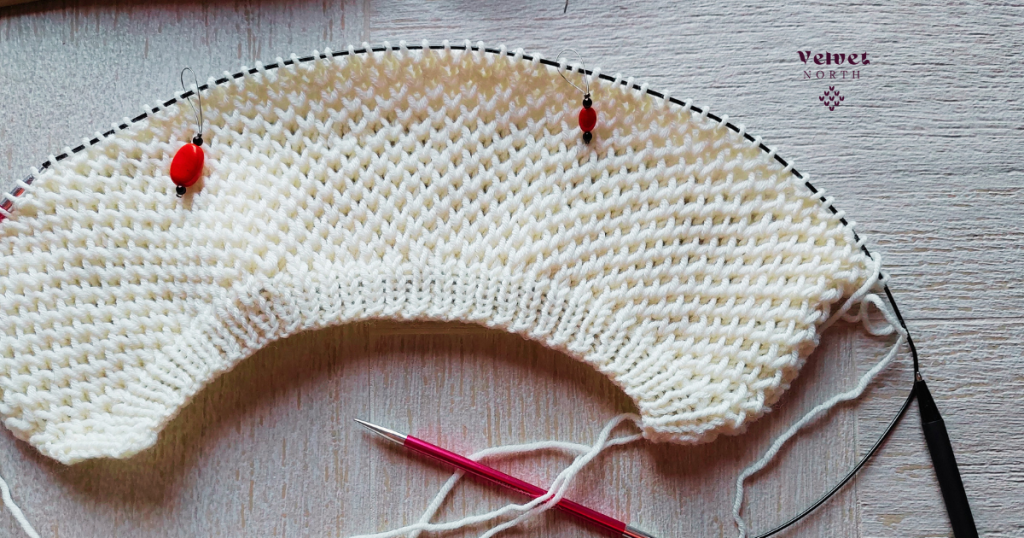
Row 1 (RS): HB22, SM, HB to 1 sts before M, ssk, turn
Row 2 (WS): Slst, HB to 1 sts befor M, purl2tog, turn
Row 3 (RS): Slst, HB to 1 sts befor M, ssk, turn
Repeat Rows 2-3 until you have 11 stitches from the right and left side (for all sizes).
From this point we are going to decrease not only side stitches but also the central ones.
First Row (RS): Slst, k2tog, HB to 3 sts before M, knit2tog, ssk, turn
Second Row (WS): Slst, HB to 1 sts befor M, purl2tog, turn.
Repeat last two rows until you have 6 stitches left in total. Cast off.
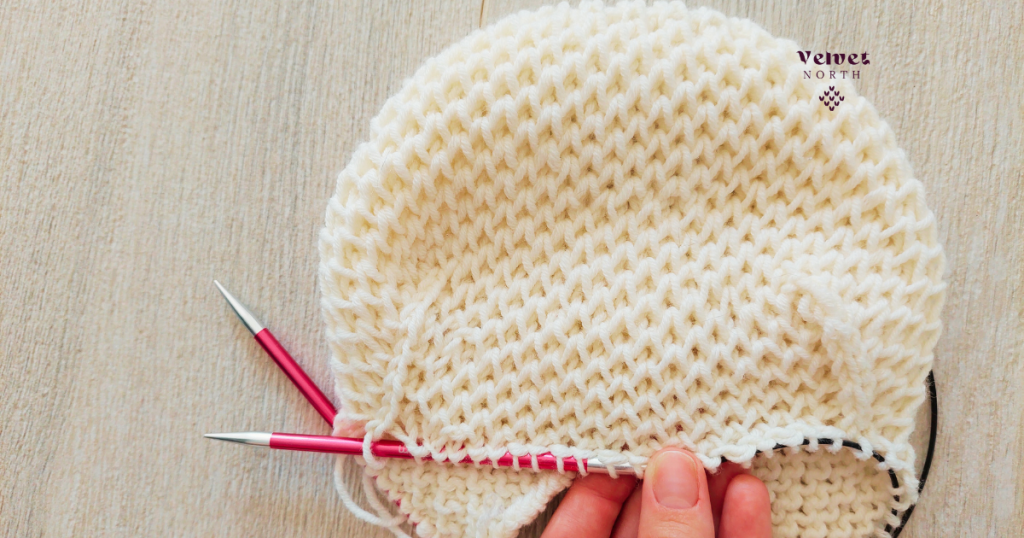
Pick up stitches along the edge. To do it, insert the needle back to front, wrap the yarn and draw a loop. We are doing it to leave all seams on the right side of the hat.
Rip k1, p1 until you reach 2-3 cm. Bind off all stitches. Check the video tutorial if you want to try an elastic bind off method.
Add ties to the honeycombe brioche stich baby bonnet
Knit until the length of the I-cord reaches at least 20-25 cm or 8-9 inches. Make two.
Weave in ends and and sew it to the bonnet. I have created a short video how to make I-Cord.
