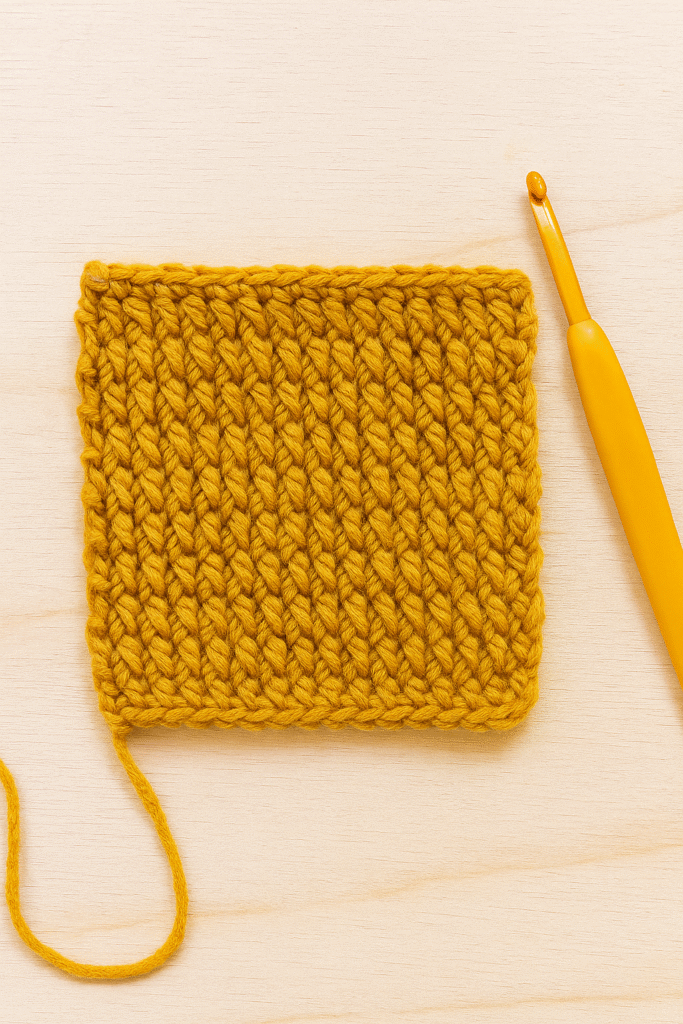
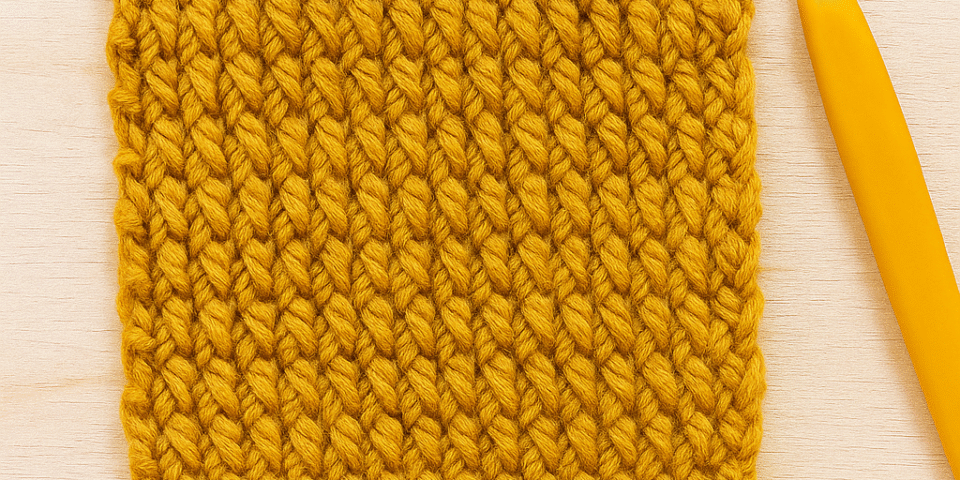
Alpine stitch crochet is a richly textured technique that transforms simple stitches into a grid-like fabric with raised columns and deep pockets. The alpine stitch crochet creates a highly textured, thick fabric ideal for cozy blankets and durable items. By alternating front post double crochets (fpdc) with standard double crochets (dc), you achieve a sculptural surface that’s both squishy and structured.
Whether you’re a beginner looking to expand your repertoire or an experienced crocheter seeking fresh inspiration, mastering alpine stitch crochet opens doors to blankets, scarves, home accessories, and more. In this guide, we’ll explore why this stitch stands out, break down the steps, cover project ideas, share pro tips, and answer common questions—so you can dive straight into your next textured creation.
Why Choose alpine stitch crochet?
The alpine stitch crochet offers a blend of beauty and functionality:
- Intense Texture: The alternating fpdc and dc create a waffle-like pattern with raised columns and recessed spaces, perfect for trapping warmth.
- Versatile Weight: Works beautifully with light, medium, or bulky yarns—each weight accentuates the texture in unique ways.
- Durable Structure: The thickness of alpine stitch crochet yields a sturdy fabric suited for blankets, totes, and rugs.
- Design Potential: Use color changes or variegated yarns to highlight the stitch pattern in scarves, cowls, or garment panels.
Getting Started with alpine stitch crochet
Materials
Gather these essentials before you begin your alpine stitch crochet journey:
- Yarn: Light to medium-weight (Category 3 or 4) for clear definition; bulky yarn for a super-plush result.
- Hook: Adjust to your yarn label—commonly between 5 mm and 6.5 mm.
- Scissors and yarn needle: For clean finishes and weaving in ends.
- Stitch markers (optional): Keep track of row repeats in large projects.
Fundamental Stitches
You only need three basic stitches to create the alpine stitch crochet pattern:
- Chain (ch)
- Double crochet (dc)
- Front post double crochet (fpdc)
Mastering even tension is key: too tight will flatten the texture; too loose will lose definition.
Step-by-Step alpine stitch crochet Tutorial
Follow this workflow to establish the signature ridges and pockets of the alpine stitch crochet fabric.
1. Foundation Chain
Chain an even number of stitches plus one extra chain.
Example: For a 20-stitch repeat, chain 20 + 1 = 21 ch.
2. Row 1 (Base Row)
- Dc in the third chain from hook and in each remaining chain.
- Ch 2 (counts as first dc), turn.
3. Row 2 (Texturing Begins)
- Ch 2 (counts as dc), fpdc around next dc from the row below, dc in next dc; repeat – across.
- Ch 2, turn.
4. Row 3 (Alternating Columns)
- Ch 2, dc in next dc, fpdc around next fpdc; repeat – across.
- End with a dc in last stitch, ch 2, turn.
5. Repeat Rows 2 & 3
Continue alternating these two pattern rows until your piece reaches the desired length.
Finish on Row 3 for a balanced edge.
For additional photo and video guidance, consult these free tutorials:
- How to Crochet Alpine Stitch + Written Pattern at B.Hooked
- Free Tutorial and Inspiration at Crochetpedia
- Easy 7-Step Guide with Images at CrochetMind
- Bella Coco’s Video and Written Walkthrough at Bella Coco Crochet

Creative Projects with alpine stitch crochet
The alpine stitch crochet pattern shines in a variety of projects. Here are a few ideas to spark your creativity:
Blankets and Throws
- Thick, snuggly blankets trap heat in their pockets.
- Use two complementary colors for a striped alpine throw.
Scarves and Cowls
- Showcase ridges by alternating neutral and vibrant yarns.
- A bulky yarn scarf in alpine stitch crochet works up quickly and looks luxe.
Dishcloths and Washcloths
- Raised fpdc columns scrub effectively.
- Deep pockets hold soap suds for a richer lather.
Home Décor Accents
- Pillow covers, placemats, or table runners gain structure and visual interest.
- Insert alpine stitch crochet panels into garment yokes or cuffs for a tactical detail.
Pro Tips for flawless alpine stitch crochet
- Maintain consistent tension: Test hook sizes until your swatch shows well-defined ridges.
- Count stitches at row ends to avoid gaps or bulges.
- Block finished pieces to even out textures and sharpen edges.
- Experiment with variegated yarn to let colors flow through the grid.
- Use stitch markers to flag each repeat span in wide pieces.
Frequently Asked Questions
Q: Is alpine stitch crochet suitable for beginners?
Yes. If you’re comfortable with dc and fpdc, alpine stitch crochet is straightforward and rewarding. The pattern repeats after two rows, making it easy to memorize.
Q: Can I use bulky yarn for alpine stitch crochet?
Absolutely. Bulky or super-bulky yarn accentuates the grid texture and speeds up your work, ideal for quick-to-make home accessories.
Q: How do I prevent alpine stitch crochet from curling at edges?
Use ch 2 at row turns instead of ch 3, and block lightly after finishing to relax fibers into a flat form.
Q: Is alpine stitch crochet reversible?
No. The front showcases deep texture; the back shows a smoother, flatter surface. Plan your project so only one side is on display.
For exclusive stitch collections and unique accessory patterns, explore the FREE pattern library.
Advanced Variations of alpine stitch crochet
1. Colorwork Stripes in alpine stitch crochet
Incorporating stripes elevates alpine stitch crochet beyond solid-color fabrics. To create crisp color changes:
- Carry the unused yarn along the row’s edge, catching it with each dc and fpdc.
- Switch colors at the start of Row 2 or 3, ensuring you finish the last yarn-over with the new hue.
- Alternate thick and thin stripes by working 2–4 rows per color block.
- Use high-contrast or tonal palettes to highlight the raised columns and recessed pockets of alpine stitch crochet.
2. Ombre & Gradient Effects
Gradient skeins and hand-dyed yarns pair beautifully with alpine stitch crochet:
- Let the color transitions flow naturally through the grid pattern.
- Balance long color repeats by trimming the skein or alternating plies.
- Swatch first to see how the gradient interacts with the stitch depth—sometimes pooling adds unexpected charm.
Combining alpine stitch crochet with other textures
Mosaic Crochet Accents
Overlay mosaic crochet panels onto alpine stitch crochet bases:
- Work a rectangular section in alpine stitch crochet.
- Switch to mosaic crochet for 6–8 rows, using slipped stitches for geometric motifs.
- Return to alpine stitch crochet for continuity.
Bobbles and Popcorns
Enhance the tactile appeal by inserting bobble or popcorn stitches:
- Identify every 6th fpdc column as a “popcorn foundation.”
- Replace the dc above with a bobble cluster.
- The result: a hybrid texture that marries alpine stitch crochet’s depth with bobble playfulness.
Customizing gauge and yarn weights
Alpine stitch crochet thrives in multiple gauges:
- Lightweight Cotton (Sport/Baby #2): Produces delicate, lacy texture—perfect for shawls.
- Worsted Weight (Medium #4): Classic gauge for blankets and scarves; grid shows clearly.
- Bulky/Super Bulky (#5–6): Ideal for chunky cowls and rugs; works up quickly with exaggerated texture.
Adjust hook size for desired drape: go up one size for a softer, looser fabric or down one for crisp ridges.
Troubleshooting alpine stitch crochet
- Uneven Edges: Ensure you always ch 2 at row ends and count stitches before turning.
- Flat Texture: If fpdc columns aren’t rising, check that you’re working post stitches around the entire post, not just the stitch top.
- Gaps Between Columns: Maintain consistent tension; tighten up on chains and standard dcs to prevent holes.
Care and Maintenance for alpine stitch crochet projects
- Washing: Hand-wash or machine-wash on gentle cycle in a mesh bag to protect post stitches.
- Drying: Lay flat to dry, lightly reshaping pockets and columns. Avoid hanging, which can stretch the fabric.
- Blocking: Steam block with a low-heat steamer or pin damp pieces to shape; don’t over-stretch.
Inspiration: alpine stitch crochet in modern designs
- Scandinavian-inspired blankets featuring neutral palettes and minimalist motifs.
- Textured winter cowls with alternating alpine stitch and ribbed panels.
- Kitchen linens where alpine stitch crochet’s raised columns provide scrub power.
- Statement throw pillows mixing alpine stitch crochet with Tunisian honeycomb inserts.
Frequently Asked Questions
Q: How do I adapt an existing pattern to alpine stitch crochet?
A: Calculate your gauge in alpine stitch crochet, then adjust the pattern’s stitch count to a multiple of the stitch repeat (2 rows × any even number of stitches + 1).
Q: Can I combine alpine stitch crochet with knitting?
A: Yes. Knit your main fabric, then add a crocheted alpine stitch crochet border by working fpdc into knit stitches from the wrong side.
Q: What’s the best way to carry floats in multi-color alpine stitch crochet?
A: For long color floats, carry the yarn along the back, catching it every 4–6 stitches to secure without bunching.
Expand Your Skills
For a curated selection of exclusive stitch patterns, visit our stitch library.

